
News
How to Choose a Machine Vision Camera: Resolution, Sensor, Interface and Price
Short answer: To choose a machine vision camera, start from the inspection task, not the catalogue. Define the field of view and the smallest feature you must detect, then calculate the resolution you need. Next, choose the sensor (monochrome or colour, global or rolling shutter), check that the frame rate keeps up with your line, and pick an interface that suits your cable length and data rate. Price comes last — and it should be judged as part of the whole vision system, not the camera alone.
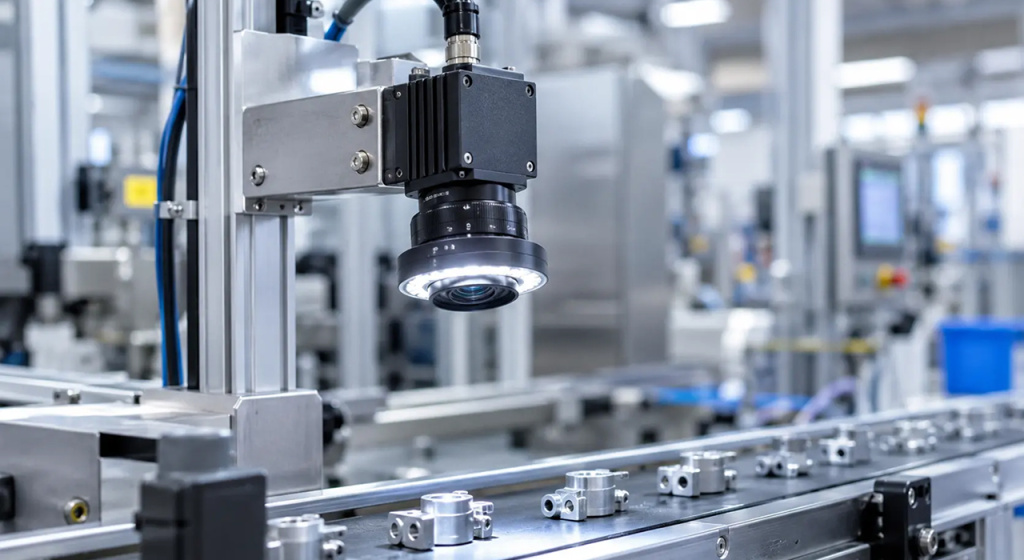
What Is a Machine Vision Camera?
A machine vision camera is an industrial camera that captures images for software to analyse, rather than for people to look at. It sends image data to a PC, vision controller or embedded processor, where software decides whether a part passes, measures a dimension or reads a code.
If you are new to the topic, our guide to what machine vision is explains how cameras, optics, lighting and software work together as one system.
How Is a Machine Vision Camera Different from a Normal Camera?
A consumer camera is built to produce a pleasing picture. A machine vision camera is built to produce a consistent, repeatable measurement on a production line.
| Machine vision camera | Consumer camera | |
|---|---|---|
| Purpose | Images for software analysis | Images for human viewing |
| Image processing | Minimal; raw data passed to vision software | Heavy in-camera enhancement |
| Triggering | External trigger, synchronised with the line and lighting | Shutter button or automatic |
| Integration | Industrial interfaces, I/O and machine-vision software | Consumer connectivity |
| Operation | Designed for continuous industrial use | Designed for occasional use |
How Do You Choose a Machine Vision Camera? A 7-Step Checklist
If you are wondering how to choose a camera for machine vision, the most reliable method is to work through the requirements in a fixed order. Each step narrows the options for the next one.
- Define the task. Presence check, measurement, defect detection or code reading — each has different demands.
- Measure the field of view. How large is the area the camera must see?
- Identify the smallest feature. The smallest defect, gap or character you must reliably detect.
- Calculate the resolution from those two numbers (see the next section).
- Choose the sensor: monochrome or colour, global or rolling shutter, sensor and pixel size.
- Check speed and interface: frame rate, data rate and cable length.
- Assess the total cost of camera, lens, lighting, software and integration.
A common mistake is to start at step 7 and buy the highest resolution the budget allows — it adds data and cost without improving results.
Which Type of Camera Do You Need: Area Scan, Line Scan, Smart or 3D?
Before you select a camera for machine vision, decide which type the task needs. Most inspection tasks use an area scan camera, which captures a full two-dimensional image in one exposure; other types solve specific problems:
| Camera type | Best suited to |
|---|---|
| Area scan | Discrete parts, assemblies, labels, most general inspection |
| Line scan | Continuous materials (film, paper, metal strip) and very large or cylindrical objects |
| Smart camera | Compact stations where the camera itself runs the inspection |
| 3D camera | Tasks that need height, volume or depth information |
If you are deciding between the first two, our comparison of area scan vs. line scan cameras covers the trade-offs in detail. For all-in-one devices, see what a smart camera is, and for depth measurement, our overview of 3D machine vision camera types. The rest of this guide focuses on area scan cameras.
How Do You Calculate Camera Resolution for Machine Vision?
Camera resolution follows directly from two numbers: the field of view and the smallest feature you need to see. Divide the field of view by the size each pixel may represent, and you get the minimum number of pixels across the image.
Key terms:
- Field of view (FOV): the size of the area the camera images, in millimetres.
- Smallest feature: the smallest detail the system must reliably detect or measure.
- Pixels per feature: how many pixels should span that detail.
- Spatial resolution: the real-world size covered by one pixel (mm per pixel).
The calculation has two steps, as described in this resolution tutorial from 1stVision:
- Spatial resolution = smallest feature ÷ pixels per feature
- Image resolution = field of view ÷ spatial resolution
Finding an edge needs at least 2 pixels with excellent contrast; for robust results, plan for 3–4 pixels across the feature.
Worked example: a 0.25 mm hole inspected in a 40 mm field of view, with 4 pixels across the hole.
- Spatial resolution = 0.25 mm ÷ 4 = 0.0625 mm per pixel
- Image resolution = 40 mm ÷ 0.0625 mm = 640 pixels
The camera therefore needs at least 640 pixels along that axis, and a 640 × 480 (VGA) sensor would meet the requirement. Repeat the calculation for the second axis.
Treat the result as a minimum: it assumes a lens that resolves the detail and lighting with strong contrast. Our guide to choosing a machine vision lens and lighting covers that side of the calculation.
Which Sensor Should You Choose?
For most new machine vision projects, the choice is a CMOS sensor with a global shutter, in monochrome unless colour is part of the inspection. The details below explain when to deviate from that default.
CMOS or CCD?
CMOS has largely closed the gap with CCD. According to Edmund Optics, high-end CMOS sensors can outperform comparable CCDs in many applications, while using less power. CCDs still offer high uniformity, but low-end CMOS sensors with very small pixels remain weaker in image quality.
Global Shutter or Rolling Shutter?
- Global shutter: all pixels are exposed at the same moment.
- Rolling shutter: the sensor exposes and reads out line by line, so each line is captured at a slightly different time.
On a moving line, a rolling shutter can distort the shape of fast-moving parts. Choose a global shutter for moving objects; a rolling shutter is acceptable for static or slow scenes, or when a strobe is timed to the exposure.
Monochrome or Colour?
Choose monochrome unless the inspection depends on colour. A monochrome sensor delivers higher effective resolution than a comparable single-chip colour sensor, along with better signal-to-noise ratio, contrast and low-light sensitivity. Single-chip colour sensors typically use a Bayer filter mosaic, so colour has to be reconstructed in software.
Colour becomes necessary when the task itself is about colour: sorting by shade, checking colour-coded parts or verifying print.
Does Sensor and Pixel Size Matter?
Yes. Larger pixels collect more light, which helps with short exposures on fast lines. The sensor size must also match the lens: the lens has to cover the whole sensor without dark corners.
To compare sensors fairly across manufacturers, look for data measured to EMVA 1288, the European Machine Vision Association standard for measuring and presenting camera and sensor specifications.
Some applications need sensors outside the visible spectrum. Short-wave infrared models such as the MV-CI050-Y1S-NN can reveal details that a standard sensor does not capture.
How Fast Does the Camera Need to Be?
The frame rate must keep up with your line, with a margin for processing. Multiply parts per second by images per part, and check that the camera and interface can sustain that rate at the chosen resolution.
Exposure time matters too: if a part moves during the exposure, the image blurs, and shorter exposures need more light.
Which Interface Is Best: GigE, USB3, CoaXPress or Camera Link?
GigE is a practical default for most factory installations because it supports long cables without a frame grabber. USB3 suits short, compact setups, while CoaXPress and Camera Link serve high-bandwidth applications.
| Interface | Data rate | Max. cable length | Frame grabber |
|---|---|---|---|
| USB3 | 5 Gb/s | 3 m (recommended) | Optional |
| GigE | 1 Gb/s | 100 m | Not required |
| 5GigE | 5 Gb/s | 100 m | Not required |
| 10GigE | 10 Gb/s | 100 m | Not required |
| CoaXPress | up to 12.5 Gb/s | over 100 m at 3.125 Gb/s | Optional |
| Camera Link | up to 6.8 Gb/s | 10 m | Required |
Source: Edmund Optics, camera types and interfaces for machine vision (linked above).
How to decide:
- GigE / 10GigE: the camera sits far from the PC, or several cameras share one network. Some GigE cameras also support Power over Ethernet. The CT series is an example of GigE matrix cameras.
- USB3: short distances and simple single-camera stations.
- CoaXPress: high-resolution or high-speed cameras that need the most bandwidth over long cables.
- Camera Link: mainly existing systems built around it; power must be supplied separately.
How Much Does a Machine Vision Camera Cost?
The camera price depends mainly on resolution, frame rate, sensor type and interface — and the camera is usually only one part of the system budget. A higher-resolution or faster camera generates more data, which can push you towards a faster interface, a frame grabber or a more powerful PC.
When budgeting, include:
- the lens and lighting;
- cables, mounts and, where needed, a frame grabber;
- vision software, such as VisionMaster;
- integration, testing and commissioning.
The right comparison is not between camera prices, but between the system cost and the value it delivers. Our guide to machine vision ROI shows how to calculate the payback.
Which Camera Is Best for Machine Vision?
There is no single best machine vision camera. The best camera is the one that meets your resolution, speed and interface requirements with a safety margin — without paying for capability you will not use.
When people ask what the best industrial cameras for machine vision are, the honest answer is a well-matched portfolio rather than one model. The Hikrobot area scan camera range, for example, covers resolutions from 0.3 to 604 megapixels with GigE, 10GigE, USB 3.0, Camera Link and CoaXPress interfaces, so a camera can be matched to the task rather than the other way round. For continuous materials, the equivalent choice is among line scan cameras.
How Do You Use a Machine Vision Camera After Choosing It?
Selecting the camera is only half the job — results depend on how the camera is set up. Knowing how to use machine vision cameras correctly comes down to a few practical steps:
- Mount the camera rigidly at the planned working distance.
- Fit the lens and set focus and aperture for the full depth of the part.
- Design the lighting for maximum contrast on the feature you inspect.
- Connect the trigger so each image is synchronised with the part and the light.
- Validate with real good and bad parts before going live.
A well-set-up camera turns into measurable quality control improvements, such as fewer escaped defects. As an official Hikrobot distributor, ELVOTEC helps manufacturers in Hungary and across Central and Eastern Europe select and integrate the right camera — contact our team to discuss your application.
Frequently Asked Questions
What resolution do I need for machine vision?
Divide the field of view by the smallest feature, then multiply by the number of pixels that should cover that feature — typically 3–4 for robust results. The result is the minimum pixel count for that axis.
Is a monochrome camera better than a colour camera?
For most inspection tasks, yes. Monochrome sensors offer higher effective resolution, better signal-to-noise ratio and better low-light sensitivity. Choose colour only when the inspection depends on colour.
When do I need a global shutter?
Whenever the object moves during image capture. A global shutter exposes all pixels at once, which avoids the distortion a rolling shutter can cause on fast-moving parts.
Is GigE or USB3 better for machine vision?
GigE is better for long cable runs (up to 100 m) and multi-camera networks. USB3 suits short, compact setups where the camera is close to the PC.